15-Minute Project: Marking Pictures to Hang

Project-Challenge

I strongly dislike trying to hang pictures that need two holes made to hang them.  Last week I finished painting Ikea spice racks to make bookshelves for our son’s nursery.  Unfortunately, they have two holes in order to hang them.

In years past, I have tried the toothpaste trick: marking the holes with toothpaste and then pressing the frame into the wall.  I still never got it right!  I didn’t place it on the wall properly.  The toothpaste would get smudged.  There was too much or too little.  It just frustrated me.

A couple months ago I was hanging some wall decor and I was faced with this dilemma.  Finally, I dug out some painters tape.  It worked like a charm!  Here’s how you can do it…

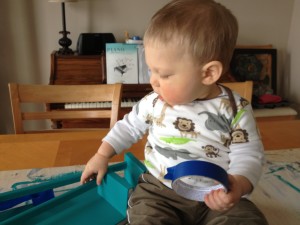
1.  Take the tape and make a strip from one hole to the other. (My little guy kept removing the tape, so I didn’t get a picture of this part!)

PT 1

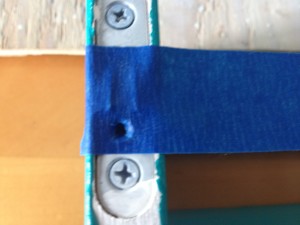
2.  Using the tip of a pen (or something with a sharp tip), punch a hole where the screw hole is.

PT 2

3.  Place the tape strip where you want on the wall.  Then mark where the hole needs to be drilled with a pen.

PT 3

Using the painters tape, you can use a leveler to make sure the picture will be hung straight.  Since you can mark the wall through the hole in the painters tape, you can remove the tape before putting your anchor and screw into the wall.

Now I can’t wait to get our bookshelves hung and make a cozy little “reading corner” in our nursery!

Facebookby feather

Posted in Projects | 2 Comments

French Toast Bake

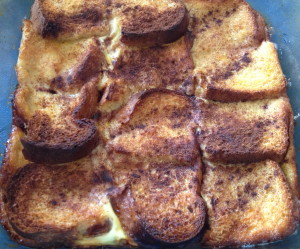
French Toast Bake

A favorite breakfast in our home is French Toast.  Since my husband was away on business for almost a week, I thought I’d surprise his favorite breakfast his first morning home.

Instead of making normal french toast, I decided to make a French Toast bake.  I was able to put it together the night before, and simply pop it into the oven when I got up the next morning.  Oh, does it smell a-MAZ-ing while it’s baking.  The aroma of cinnamon and sugar fill up the house.

A French Toast Bake is perfect for an Easter or Mother’s Day Lunch.  It’s great when you have out-of-town guests.  And it’s always a hit for any breakfast potluck.

I have no doubt you will enjoy this dish as much as we do!

French Toast Bake

1 stick butter, melted

1 cup brown sugar

6 eggs

1 1/2 cups milk

dash of salt

1 tsp vanilla

10-12 slices of bread, cut into fourths

3 medium apples (optional

Cinnamon and sugar

1.  Melt butter in the bottom of a 9×13 baking dish. Pour brown sugar evenly over butter.

2.  Layer bread in dish (2 layers).  If you are adding apples, place fruit between layers.

3.  In a bowl, mix eggs, milk, salt and vanilla. Pour over bread. Sprinkle a little cinnamon and sugar over top.

4.  Cover dish and refrigerate overnight (or for at least 2 hours).  Uncover dish and bake at 350 degrees for 45 to 60 min, until light brown and bubbly.  If you are using a glass dish, place it in the oven when you turn the oven on

Facebookby feather

Posted in Menu Planning | Tagged , , , , | Comments Off on French Toast Bake

Family Favorite: Sausage Spinach Pasta

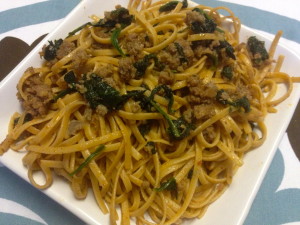
Pasta

I am super excited today! My husband has been away on business for almost a week and he is finally home.  In honor of his homecoming, I thought I’d make one of his favorite meals: Sausage Spinach Pasta.

This dish is one of the two meals he has EVER cooked for me.  It was something his mom made growing up, and one he gets excited about when he knows I’m making it.

Before I share the recipe (my version of it anyway), here’s what we plan to have for dinners this next week:

  • Thursday:  Sausage Spinach Pasta
  • Friday:  Pizza
  • Saturday:  Leftovers
  • Sunday:  Pulled Chicken Sandwiches (a new recipe I’m trying from Blog Chef)
  • Monday:  Lasagna with garlic bread and tossed salad
  • Tuesday:  Chicken Quesadillas with rice, fresh fruit and veggies

Sausage Spinach Pasta

1 lb linguine (or pasta of choice)

1 10oz bag of fresh spinach

1 lb ground Italian sausage (mild or spicey)

½ tsp salt

1 tsp garlic powder

¾ tsp onion powder

1 T chili*

pinch or two of crushed red pepper flakes

4 T melted butter or some olive oil (just enough to coat the pasta so it doesn’t stick)

  1. Cook pasta according to package instructions.
  2. Meanwhile, brown sausage.  Pack fresh spinach into the skillet with the sausage, letting it cook down with the sausage.
  3. Combine pasta, sausage/spinach mixture and remaining ingredients.  Mix well.

*  If you are using spicy sausage  (or if you don’t like spicy dishes) you may want to omit chili powder and red pepper flakes. You may also start with just a teaspoon of chili powder and add until reaches desired taste.

Facebookby feather

Posted in Menu Planning | 3 Comments

Adoption: Choosing a Baby Name

photophoto-1

Farid and I had seven short weeks to prepare for the arrival of our little boy.  Seven weeks to choose a name.  Seven weeks to AGREE on a name.

But there was one more hitch.

The birthparents wanted to be involved in deciding the name of our future baby!  As if two people agreeing on a name isn’t bad enough, four people?  Oh, this could be a challenge for sure!

Since the birthparents wanted to discuss names at our first meeting, Farid and I had about 10 days to agree on a boy name.  So immediately, being a “book” person, I told Farid, “I’ll just go to the library and pick up a baby name book.”

No sooner had I said that, my “techy” husband was opening a Baby Name app on the iPad.  I should have known!  Surprisingly, Farid and I had picked our top three names in record time.

Now we just had to meet the parents, and agree on a name with them.

Somewhere in the middle of our first meeting with the birthparents, the subject of the name came up.  Farid handed over the iPad with a list of about 10 names that we liked, and the birth mom gave us her list.  Between the two lists there was one common name: Gavin.

The middle name wasn’t as easy choose.  Originally, the birth mom said it was up to us as to what we wanted, then she came back a week later requesting a name.

Finally, we settled on Zachariah.  The name Zachariah means “The Lord has remembered”.  It was perfect for him. It was exactly how Farid and I felt.  We had prayed for years for the Lord to answer our plea for a baby.  Now the Lord was answering.  In our waiting, the Lord remembered!

Gavin Zachariah.  We couldn’t wait to meet him.  He couldn’t arrive fast enough.  Five more weeks of waiting.  That’s all we had left!


Facebookby feather

Posted in Adoption | Tagged , , , , | Comments Off on Adoption: Choosing a Baby Name

Baby Food Favorite: Swaccoli

IMG_2086

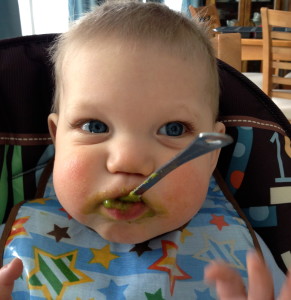
My son loves his vegetables.  While he pushes away some of the pureed veggies, he still loves his Swaccoli (sweet potatoes and broccoli)!  He won’t even let go of the spoon.  Best yet, I love making it.  It is so simple to make and packed with great nutrition.

Swaccoli

(adapted from www.nurturebaby.com)

2 medium sweet potatoes

2 medium stalks of broccoli

1/2 cup to 2/3 cup of water

1.  Preheat oven to 400 degrees. Wrap sweet potatoes in foil (I like to puncture the potatoes a few times with a fork before wrapping). Bake for 40 minutes

2.  Wash and cut broccoli into small chunks.  Steam for 5-6 minutes, until broccoli is tender.

3.  Once sweet potatoes are cool to touch, peel off the skin.  Place sweet potato and broccoli into a blender and blend until smooth.  Add water if necessary.

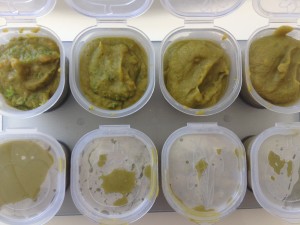
4.  Distribute mixture into desired freezable containers.

Swaccoli

Servings:  This recipe made 13 2-oz servings!

Facebookby feather

Posted in Baby Food | Comments Off on Baby Food Favorite: Swaccoli

15-Minute Project Challenge

Project-Challenge

A lot can be done in 15 minutes.  A load of laundry can be folded and put away. Windows can be washed. A room can get decluttered. A bathroom can be cleaned.  My house can get vacuumed (it’s not that big!). The list goes on.

For me, I can keep up with everyday housekeeping.  It’s part of my routine.  It’s the “extra” things, the little (or sometimes big) projects that seem to loom over me.  Every week I think, “This is the week I’m going to get a project done.” Yet week after week the projects remain on my list.

One of the biggest projects on my list has been decorating my son’s bedroom.  He is almost one year old and it is still not finished.  Oh, do I feel like a complete failure sometimes when I see someone else’s nursery all beautifully decorated and incredibly organized. Everything seems to be in place.

Then I look at my nursery.  It’s a work in progress for sure! But honestly, when have I had the time to focus on it?

Over the last month or so, I have diligently  worked on something, one small step at a time.  Oh the sense of accomplishment as I complete the small tasks!! I am so excited to finally be in the final phases of decorating and organizing the nursery! And this is what I learned…

1.    Break the project into smaller projects

Make a list of everything that needs to be done.  For our nursery, my list looked like this:

–       Paint picture frames

–       Hang owl pictures above crib

–       Put up the owl tree decal

–       Paint Ikea spice racks for bookshelves

–       Hang bookshelves

–       Organize closet

 2.    Determine the plan of attack

Know what needs to be done and figure out the steps needed to take to get it done.

Now, the owl tree decal was a project in itself.  Each limb of the tree, every single leaf, each owl, and each owl accent needed to be cut out.  Then, each individual pieced needed to be rubbed with a credit card on the backside to activate the adhesive. Finally, each individual piece needed to be placed on the wall, rubbed again, and the front piece of sticky paper removed.

3.    Take 15-minutes a day to work on the project

Trying to find time to get the owl tree up in a single day was nearly impossible.  So as I had a few minutes, I would cut out each piece, or rub the backside.  After 2 weeks of tedious work in small chunks of time, the tree was finally up!

This week, I plan to finish painting the Ikea spice racks.  Saturday, I pulled them out of the garage and put them on a big board on my dining room table.  This gives me easy access AND motivation, because I don’t want to have to look at them every day for the next month! After 15-minutes of work, look what I was able to accomplish:

photo-43

Two and a half shelves got a coat of paint!  I can definitly get these fully painted this week!!

Working on something for 15-minute at a time is not so overwhelming! 

What project do you need to get done?  Start today, just 15-minutes at a time, and you’ll be done sooner than you know it!

Facebookby feather

Posted in General | 3 Comments

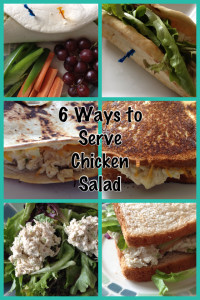
6 Ways to Serve Chicken Salad

Chicken Salad

Chicken Salad is one of my favorite lunches to make, or even a quick dinner on a busy day!  It’s easy to make, tastes delicious, and it can be served in different ways.  Here are some of my favorites:

1.  Chicken Salad Sandwich

This is probably the most obvious and widely eaten variation. Once your chicken salad mixture is made, simply spread it over a slice of bread, add lettuce and tomatoes if desired, and top with another slice of bread.

2. Chicken Salad

Simply serve the chicken salad mixture over a bed of lettuce.

3.  Chicken Salad Pita

Scoop the chicken salad into a pita, add lettuce, tomato, and whatever veggies you like, and enjoy!

4.  Chicken Melt

Butter two slices of bread.  Spread chicken salad mixture over unbuttered side of bread.  Add your favorite cheese (I like cheddar) and a slice of tomato, and place on a small skillet.  Cook over the stove like you would a grilled cheese.  If you’re making lots of them, simply place the uncooked sandwiches onto a baking sheet and bake in the oven at 350 for about 5-8 minutes (until bread is slightly toasted and cheese is melted).

5.  Chicken Salad Quesadilla

This is like the Chicken Melt, but using a tortilla instead of bread.  I like to butter the outside of a tortilla.  Turn over and scoop chicken salad mixture onto half of the unbuttered side of the tortilla.  Sprinkle cheddar cheese over the mixture, top with a tomato (or even avocado slice), and fold over the empty half of the tortilla. “Grill” in a skillet like you would a grilled.

6.  Chicken Salad Wrap

Scoop chicken salad mixture onto the center of a tortilla.  Add lettuce, cheese, tomato (or whatever you want) and roll up the sides of the torilla.  Enjoy!

Facebookby feather

Posted in Menu Planning | Tagged , , | 2 Comments

Three Quick Weeknight Meals

Tomorrow my husband is leaving for a business trip, so I don’t have to do much cooking this next week!  But I still need to eat….and I don’t think eating cold cereal for three meals a day would be very nutritious.  So I thought I’d make a few simple meals.

1.  Homemade Soup

Cream of Chix

The first meal I love is homemade soup.  I can make a pot of it and eat it for several meals.  Best yet, it’s freezeable!  Farid does not like soup, so I love making a pot of soup and freezing them into muffin tins.  Once frozen, I pop the cubes out and toss them into a freezer bag.  Then I have a quick meal to heat up whenever I want soup.

I already have some Creamy Tomato Soup in my freezer (recipe coming soon), so I plan to make some delicious Creamy Chicken soup.

2.  Chicken Salad

chix sal

Chicken Salad is quick, easy and tasty.  It’s also versatile (tomorrow I’ll be sharing different ways to serve chicken salad).

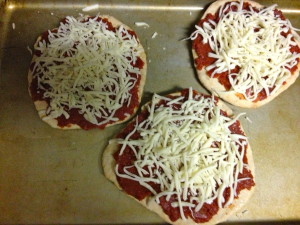
3.  Pita Pizza

IMG_2149

At our house, Friday night is usually pizza night. I typically make homemade pizza, but I don’t need an entire pizza for myself!  I love to make pita pizza because it is the perfect size for me.  Serve it with a salad and it makes the perfect meal!!

Creamy Chicken Soup

2 boneless, skinless chicken breasts, cooked and finely chopped

4 Tblsp butter

1 cup finely diced onion

¾ cup finely diced celery

3/4 cup finely diced carrot

¼ cup flour

2 cups chicken stock

2 cups milk

1-2 Tblsp lemon juice

Shredded Cheddar Cheese to garnish (optional)

salt and pepper to taste

  1. In a pot, melt butter and add finely diced onion, celery and carrots until they are soft, about 5 minutes?
  2. In a small bowl, whisk flour and milk together until well blended.  Add mixture to the vegetables.
  3. Stir chicken stock into pot.  Bring to a boil, then reduce heat to medium and let soup simmer until it thickens (about 20 minutes).  Stir frequently!
  4. Add shredded chicken, lemon juice, salt and pepper to taste.  Cook for another 3 minutes or until chicken is heated through.
  5. Pour soup into bowls, garnish with a bit of cheese and enjoy!

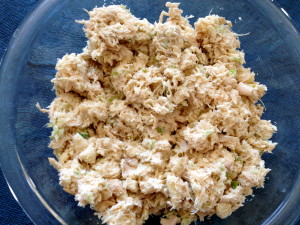
Chicken Salad

3 cups cooked chicken (you can also use 2 12.5 oz canned chicken)

¾ cup light mayonnaise

1 stalk celery, diced

½ cup (peeled) apple

salt and pepper to taste

  1. Finely dice the cooked chicken, celery and apple.  I like to use my Vitamix food processor to do this!
  2. Mix chicken, celery, apple, and mayo in a bowl.  Salt and pepper to taste

 Pita Pizza

Pita bread

Pizza sauce

Mozzarella Cheese

Any of your favorite toppings (pepperoni, sausage, veggies, etc)

  1. Spread pizza sauce over pita bread. Sprinkle with cheese and add any toppings you would like.
  2. Preheat the oven to 375.  Place pizzas on a cookie sheet.  Bake for 10-12 minutes, or until cheese is melted and the crust is crispy.


Facebookby feather

Posted in Menu Planning | Tagged , , , , , | Comments Off on Three Quick Weeknight Meals

Adoption: Meet the Parents!

us

“Although we have never met, we feel like you already have a special place in our hearts! We often think about you and ask ourselves, ‘What does she look lie? I wonder what her personality is like. What are her likes and dislikes?’”

Those were the words written on the opening page of our adoption profile book.  Now it was time to put faces to the people that had been in our prayers for years.

To say we were nervous would be an understatement.  The hour-long ride to the meeting place was quiet. I was so incredibly sick to my stomach.  What do we say to the people that chose US to be their baby’s adoptive parents? 

Now, here we were crammed into a little booth in a small diner with our caseworker, the birthparent’s caseworker, the birth mother and father, as well as one of the birth grandma’s.  The table was small, the restaurant was hot and no one knew what to say!

Awkard!

I was so thankful our caseworkers were present, as they helped start the conversation.  I am also thankful that my husband is an outgoing guy, because at some point, he got past his nerves and was able to keep the conversation going.

We asked a ton of questions that day.  How are you feeling?  Do you have any cravings? What is your favorite food? Do you have a hobby?

But the most important question we asked, the one that has stayed with me was this:  how did you choose us?

The birth father explained that he liked that Farid was a youth minister, because it was something he thought about doing one day.  The birth mom said she connected with me because like me, she liked to read and cook, and she loved music.

The birthparents admitted they had narrowed down the profiles between us and one other couple.  One thing stood out in our profile.  We lived in a neighborhood with lots of children and we had a patio.  They loved our patio!

A patio?  Who would have thought that when I placed that picture into our profile book that it would become the deciding factor of birthparents choosing us over someone else!

patio

God knew.  God knew and without me knowing the importance, He placed it on my heart to put that picture into the profile. A picture that was only originally taken to show my out-of-state sister what our newly installed patio looked like (with its lack of flowers, tiny-still-need-alot-of-growing-to-do plants and all).

What a great reminder that God is Sovereign. He is in control of all things, even the seemingly small details of our adoption.

Facebookby feather

Posted in Adoption | Tagged , , , , | 1 Comment

Sweet Potato Bites for Baby

photo-33

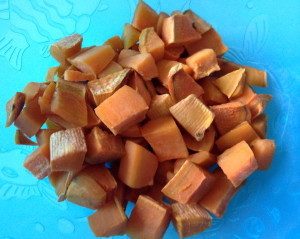
Our little guy is 10 1/2 months and has started to push away some of the pureed food I make.  So for the past couple of weeks I’ve been making Sweet Potato Bites for him.  These are the perfect finger food.  He LOVES them!  I have to admit, they are super tasty!!

Not only are they super tasty, they are super simple AND they don’t have to be just for the little one.  Kids and adults of all ages will like them.  I love making a big batch and freezing them so that I always have some on hand.

Sweet Potato Bites

(9-12 months)

3 medium Sweet Potatoes

1-2 Tblsp olive oil

(optional: you may add a pinch of cinnamon, paprika and cumin)

1.  Preheat oven to 350 degrees.

2.  Peel and cube sweet potatoes into small bites size pieces

3.  Toss sweet potatoes with oil and place them on a baking sheet in a single layer

4.  Bake for 20-30 minutes, or until the sweet potatoes are tender.

Freezer tip:  Cool potatoes.  Keep potatoes on the baking sheet in a single layer, and freeze for 1-2 hours.  Then transfer frozen potato bites into a freezer bag.  OR scoop cooled potatoes into baby freezer containers…that way you have your baby’s servings already portioned.

Facebookby feather

Posted in Baby Food | Tagged , , , , , | 6 Comments